The Big Heater Question:
I used to do most of my riding to the south so I never knew how cold it could be in the north. I know it seams silly but if you do most of your riding at Glamis or Ocotillo Wells you don’t realize how cold the rest of the world is. Now that I am in the high desert it is time to change my wardrobe and upgrade the things I can to keep me and my lovely better half happy.
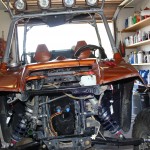
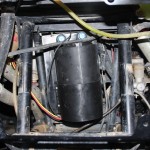
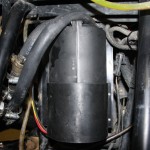
My Polaris RZR has a water cooled motor, FUTV Doors and a half windshield so why not try a heater core type heater. The first problem I saw is that I have a Rugged Radio car to car set up in the way of where I have seen most of the heaters mounted. So I decided to make a cardboard mock up of the heater from the specs that were on the website. With the box made I positioned it different places on the RZR to see if I could make this project work without looking like a hack job. I found a spot between the frame rails in front of the firewall above the front differential where I had room to run the box vertically. This seemed like a good spot out of the way, radiator hoses were close and I wouldn’t have far to run the vent hose.
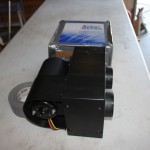
I received the kit from Maradyne 9″ Stoker™ Heaters and laid everything out to see what I was going to need. The first thing I noticed it that I was going to need a way to hook up to the radiator hoses to the heater core. I had a friend show me these Y-Fitting which were exactly what I was looking for. Next thing I did was pull the front hood, storage trunk, radiator and cooling fan to gain clearance to mount everything. I had to move the one radiator hose from between the frame rails to outside the frame. I started positioning everything into place to make sure I would have clearance with the radiator fan and be able to make the bends for the heater hoses. I was able to use the mounting brackets that came with the kit. The box fit really tight so I split a heater hose and put it on the rail that the heater box was sitting on. Then I used a u-bolt that I ran around the frame, drilled two holes in the factory bracket and held the heater box in place. It felt very secure and I felt good about it.
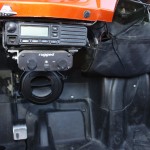
Now that I had the box roughly mounted I marked where I need to run the vent hose. I drilled an opening in the fire wall with a three inch hole saw. I then mounted the 3” vent adapter to the firewall. Next I installed a vent hose from heater box to fire wall and then from the firewall to my adjustable vent. After checking my options and setting up vents different ways the only thing I really liked was to run just one vent under my radios. With a 9.6 amps 200cfm fan I thought the volume would be enough for my RZR cab. I blocked off the other vent on the heater with the three inch piece I cut out of the firewall.
Next I figured out the best way to route the heater hoses to tie them into the radiator hoses. I installed the Y-fitting and everything looked good. I couldn’t think of any reason that I needed to shut of water to the heater core but I ran a ball valve anyway. A “PEX” ¾ inch ball valve that I got from the hardware store fit perfect.
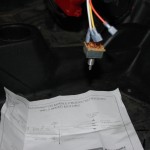
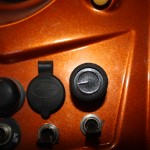
The electrical directions were self explanatory; it came with a wiring harness that was plug and play. You just had to hook up power, ground and switch. I did drill a hole in the dash to mount the 3 speed fan switch.
With the radiator and coolant fan reinstalled I started the RZR and realized I wasn’t getting in flow through the heater core. I figured out I had to bleed the system; I pulled off a heater hose from the y-fitting and filled the heater core with coolant holding the hose above the heater core. I restarted the RZR again and once the thermostat opened it started blowing hot air. Next was to check all the fittings for water leaks.
Everything was working fine until I noticed that the front storage compartment wouldn’t go in all the way because it was hitting the top of the heater box. I cut the bottom of the compartment enough to let it fit easy back in its hole. Then I cut a piece of black Lexan to make a new bottom for the compartment. I only lost a little bit of storage.
Now it is time for the big test, let’s go riding. The heater worked as it was designed to work. The dilemma is that with and open cab there is more cold air coming in the cab then a 26,000 BTU heater can keep up with. I must say my legs were warm and that made a real difference. It was definitely better with the heater then without but I still had to bundle my top half. With a full cab this heater would be perfect.
You could do this whole install for less the $200.00 and a full day of your time. I am still glad I did it and may try some things in the future to try and make it even better. You can check out all that Maradyne Mobile Products has to offer.

1 comment
So very cool! I have the exact same set-up with the rugged radio. I have a full windshield (flip up from EMP) and doors so I’m thinking it will be warm and toasty!
Thanks!